If you're planning a trip to Iceland, a glacier hike is something that must be on your agenda! After a ton of research, we settled on a Skaftafell Glacier Hike with Melrakki Adventures. Here's our full review of the tour and everything you need to know before planning your trip.

When we started planning our family vacation to Iceland, a glacier hike was one of the top items on our list! It's such a unique experience, and one that can only be had a few places in the world.
Planning our Iceland Glacier Hike
The first question you'll likely ask as you start thinking about a glacier hike - do I need a guide for a glacier hike? Yes, yes you do. Hiking on a glacier is not necessarily hard, but it can be very dangerous without the proper training. The glaciers are constantly changing - pathways that are safe for weeks can melt away entirely overnight, deep crevices can open up that are large enough to fall into, etc. So hiking on the glaciers does require a trained guide - even for experienced hikers.
The next order of business was to choose which glacier to hike. That's right - there are multiple glaciers in Iceland where you can do one of these glacier walks.
Our itinerary took us along Iceland's South Coast, which gave us two good options. The first is Sólheimajökull, which is located about 30 minutes west of the town of Vik (where most of the tours meet). The other option is to hike within Skaftafell National Park, about two hours east of Vik, where you'll be hiking on one of the glacial outlets from the massive Vatnajökull glacier.
Both are perfectly good options, but the Skaftafell hikes tend to have slightly better reviews. And you typically find more of the beautiful white and blue ice there than at Solheimajokull, which tends to be darker in color due to the higher amounts of ash in the ice.
And finally, we had to choose a specific tour. There are many excellent tour companies offering hikes from Skaftafell. As a family hiking a glacier for the first time, with a seven year old in tow, we really wanted to be in a group that was as small as possible. So we opted for this "extra small group tour" with Melrakki Adventures.
P.S. If you're also hiking as a family, here are some more tips for planning a glacier hike with kids!
Our Glacier Hike with Melrakki Adventures
We booked our tour several months in advance via Get Your Guide. I do highly recommend booking all the activities possible this way rather than direct, as they are very reliable and allow for cancellation up to 24 hours in advance with no penalty. I always appreciate having that flexibility in case of bad weather or travel delays, and knowing I won't have to argue with anyone if I need to change plans.
On the morning of the tour, we met our guide at Skaftafell Airport. Airport is probably a generous term - it was more like a small outbuilding on a dirt road. There must have been some planes there somewhere, but I surely didn't see any. ;)
But there are clean restrooms inside, which is great when you've just driven two hours to get there. (You'll need to pay, but it takes credit cards.) Yeah, I know you didn't come to hear about the restrooms but if you're a mom planning this trip, this is what you need to know.
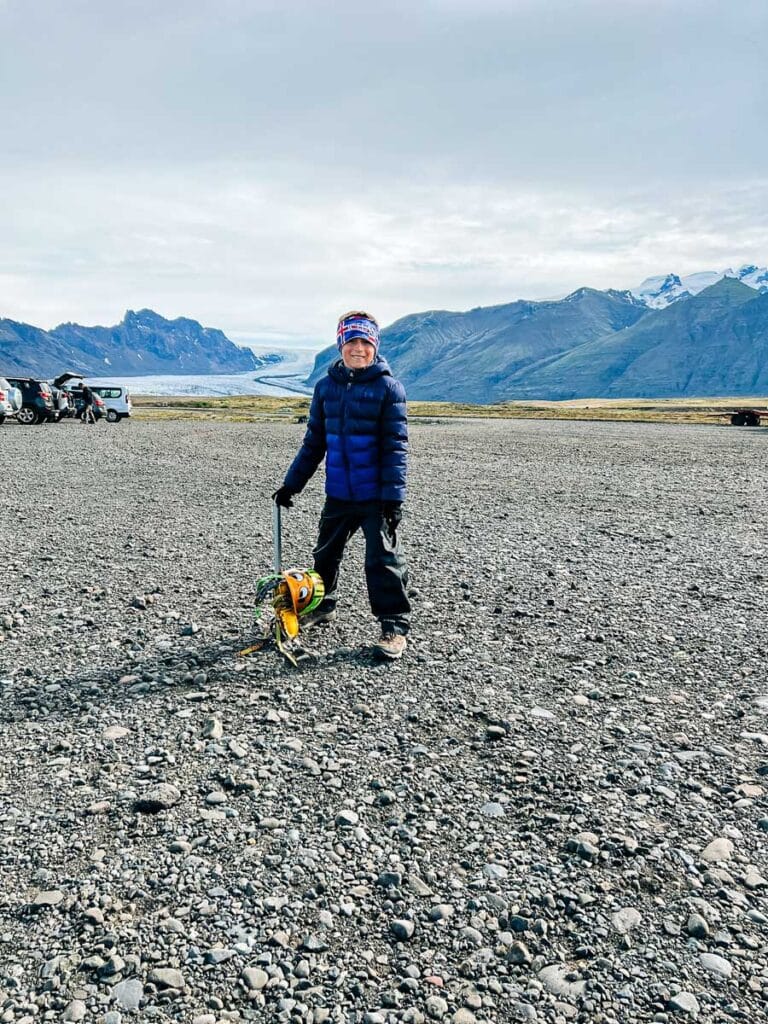
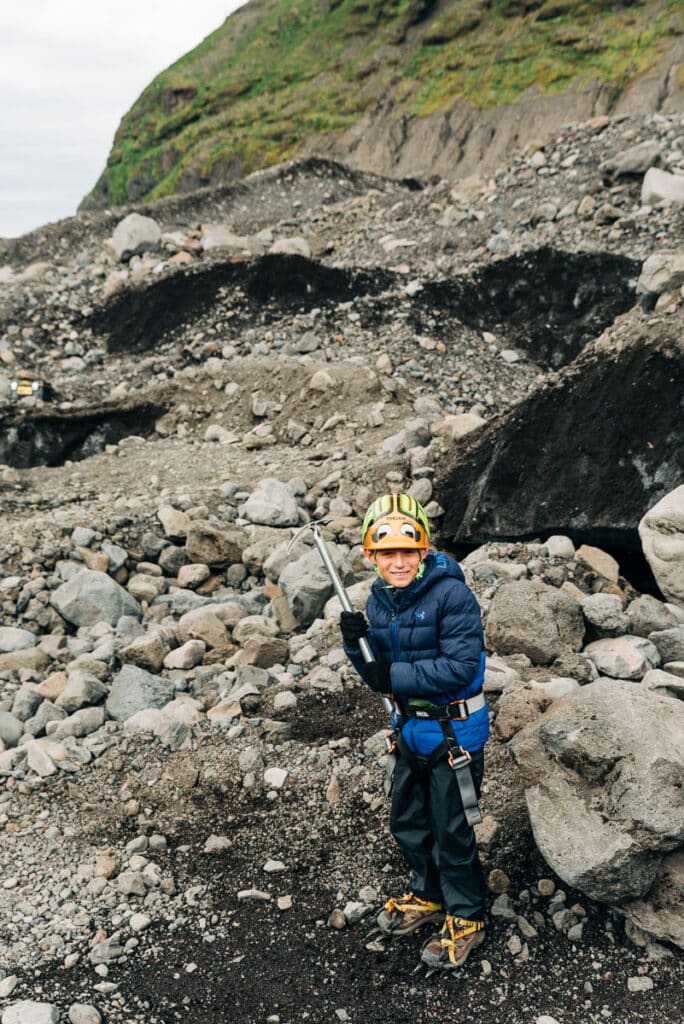
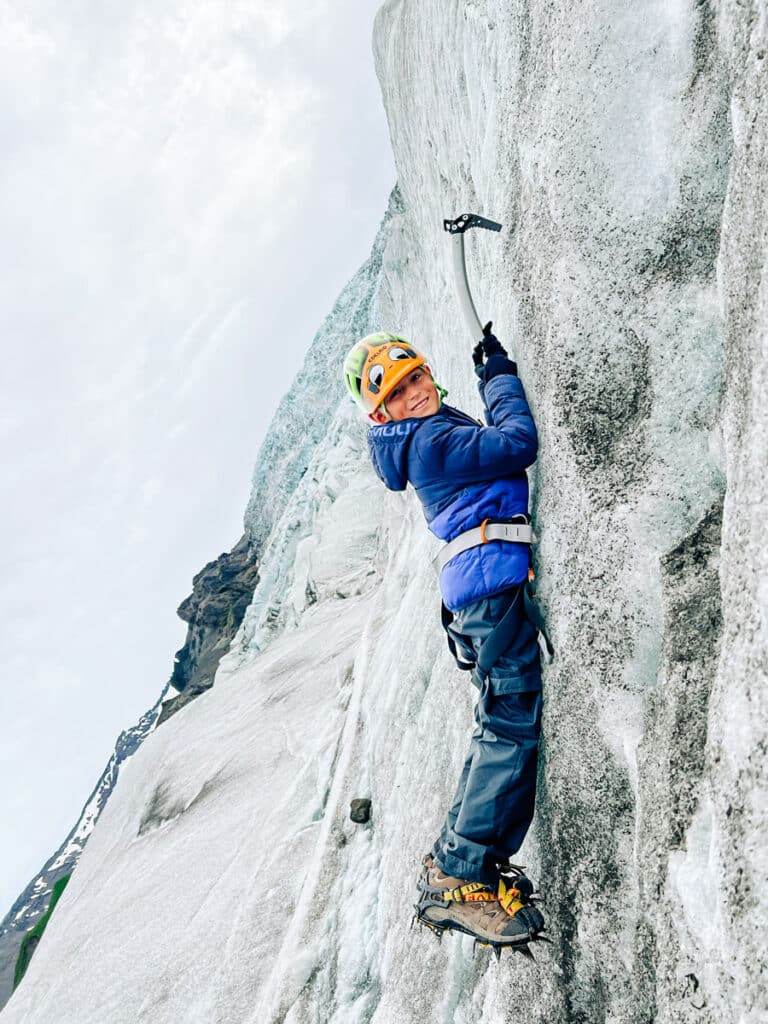
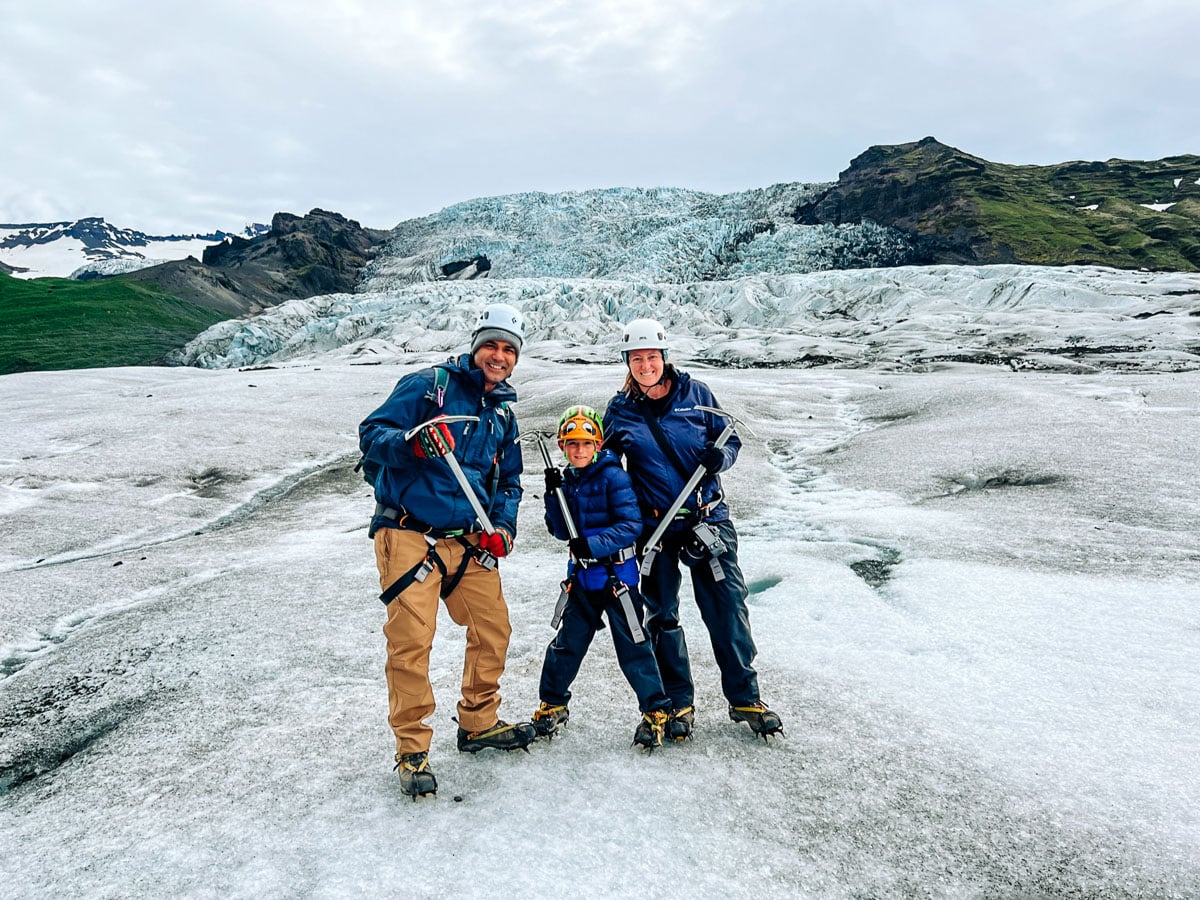
Then our guide, Andrea, got us all outfitted for the hike. She fitted everyone with helmets, harnesses, crampons, and a huge ice pick. What is the purpose of the ice pick? For the more adventurous ice climbing trips, you use the picks for climbing. For our glacier walk, they were mostly just for posing for cool Viking photos (per our guide).
The extra small group tour was capped at just eight people, so we were joined by just one other family - parents and their teenage boys. So a very small group!
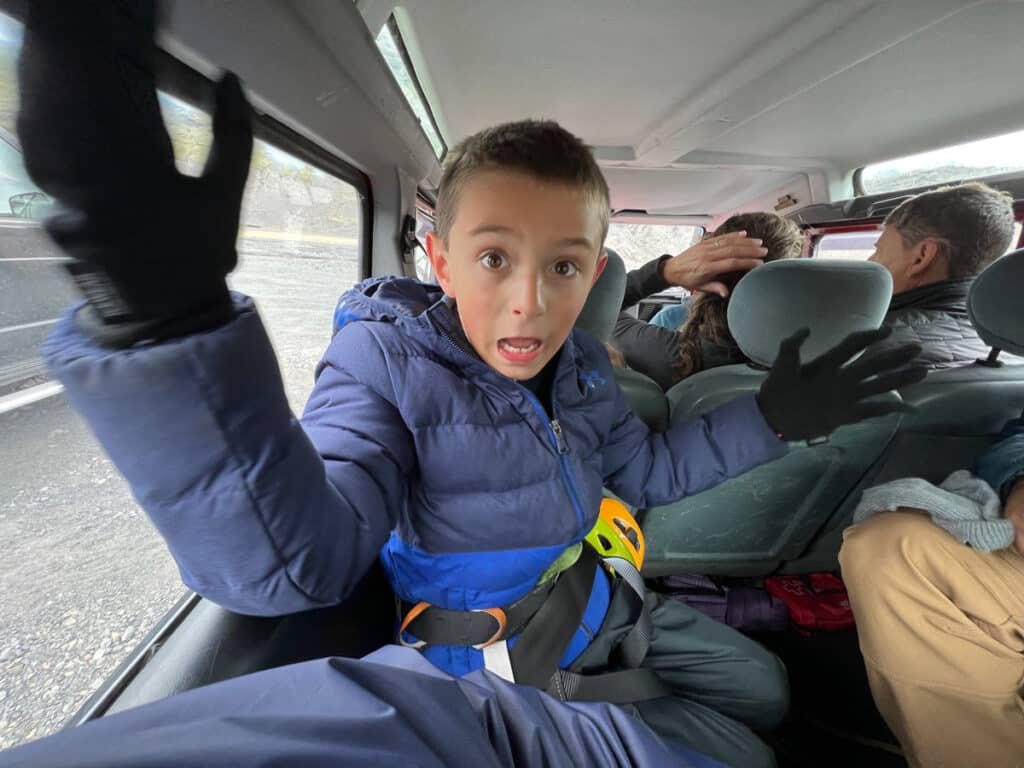
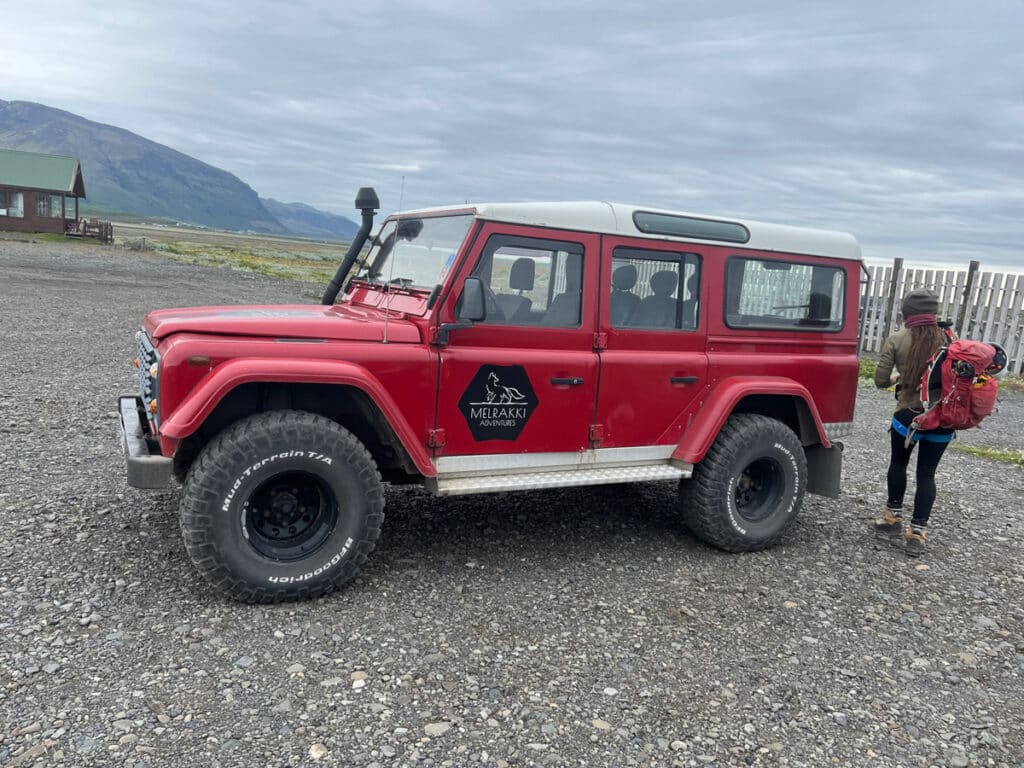
Next we loaded up into a 4x4 Jeep and took a short 20 minute ride to the base of the glacier. Now I have to say that this Jeep ride was kind of an adventure in itself. Driving up to the glacier is not for the faint of heart - you need a heavy duty vehicle to make it through the hilly dirt roads.
The majority of tour groups were parking at a parking lot a good 30 minute hike away and hiking in to the glacier. So picking a tour that drives you right up to the glacier is a huge advantage. Especially when hiking with kids - you don't want to burn up energy just getting to the glacier. You want to use that time and energy on the glacier itself.
From there, we hiked up the steep gravelly pathway to access the glacier. I think this was actually the hardest part as it was quite steep and slippery thanks to the loose gravel.
Then we took a quick stop to have everyone put on their crampons, which are basically big spikes that you strap to your feet so you can walk on the slippery ice without falling on your face. Now we have hiked with spikes before in places like Grand Canyon, but these were some seriously heavy duty crampons.
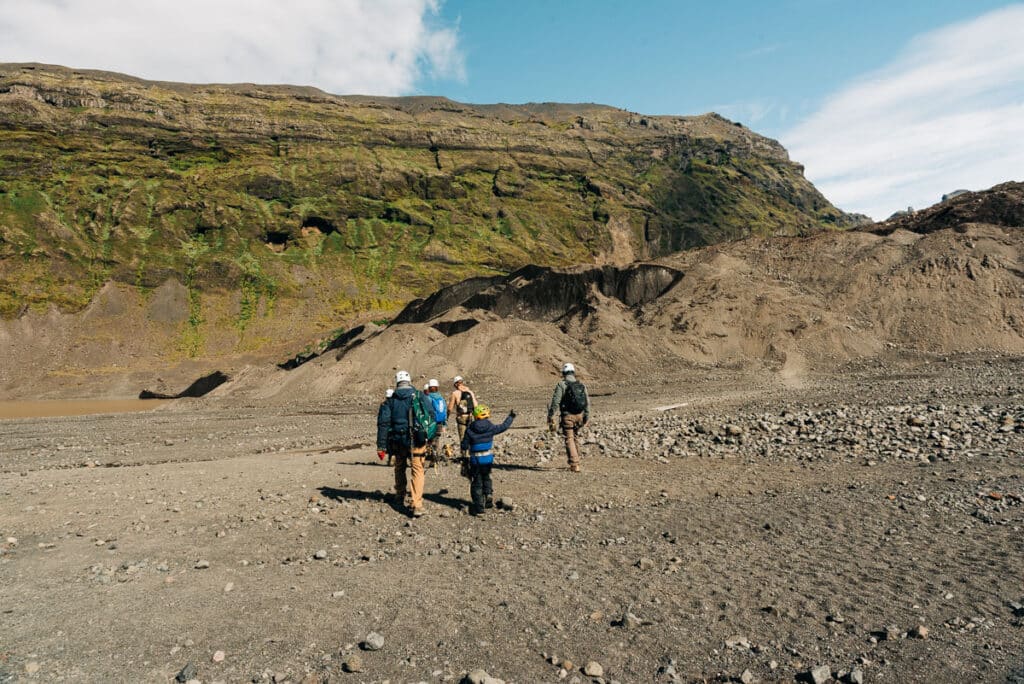
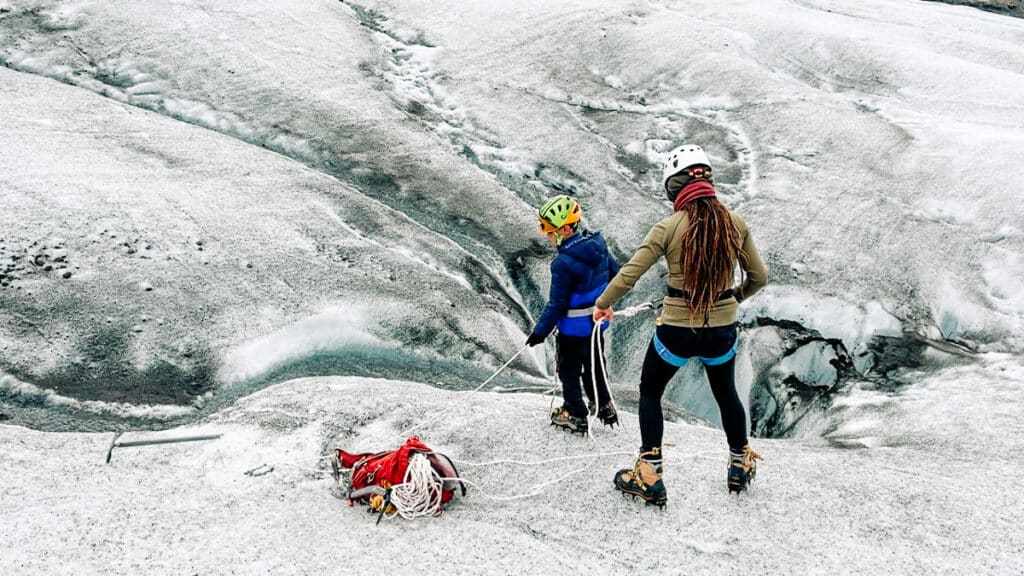
Once everyone had their crampons secured, our guide led us out onto the glacier. As my son was the only young child on the tour, she asked for him to follow directly behind her with us behind him. That way he was close to her in case of any emergencies.
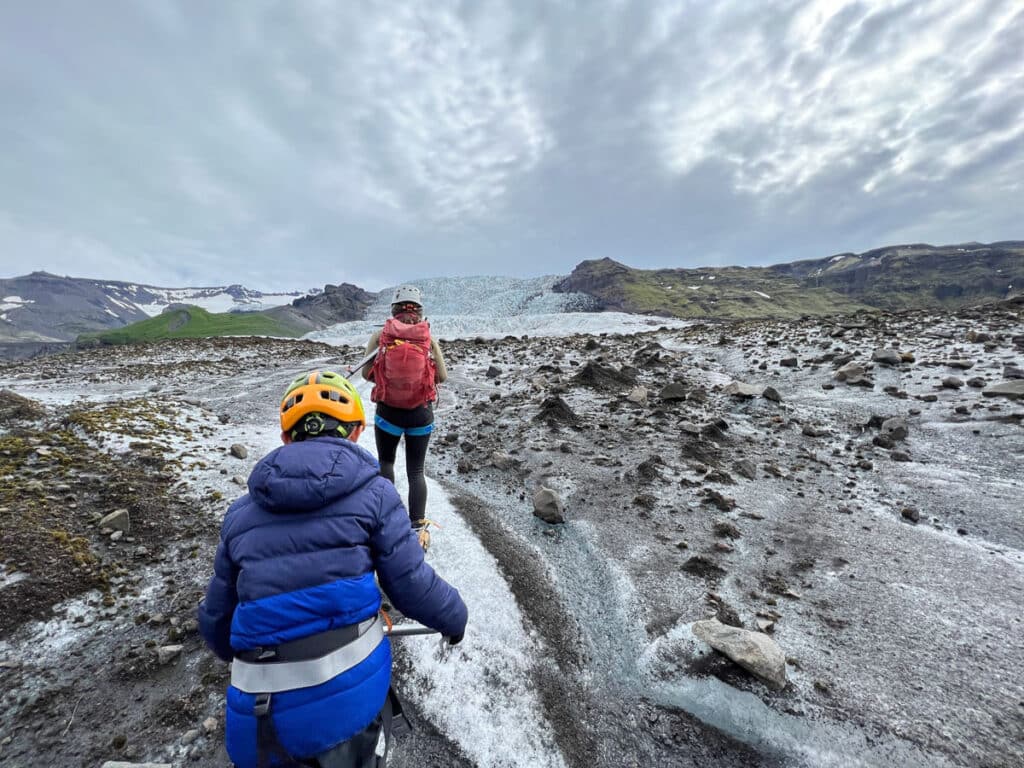
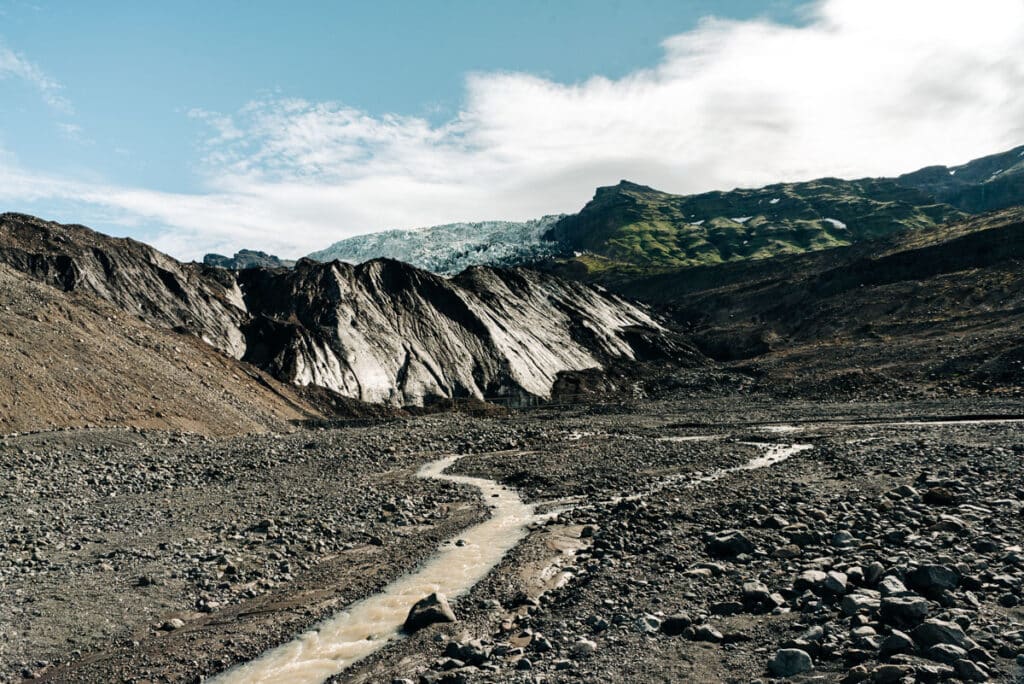
And then we got our first look at the glacier. Wow! It is absolutely massive and completely magical. It's hard to even describe what it's like to walk on the face of a glacier - you just have to experience it.
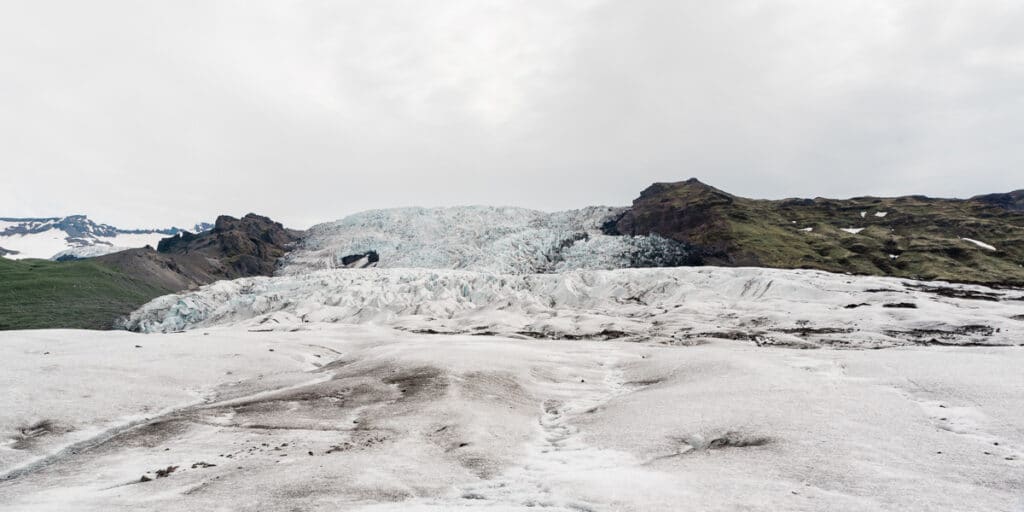
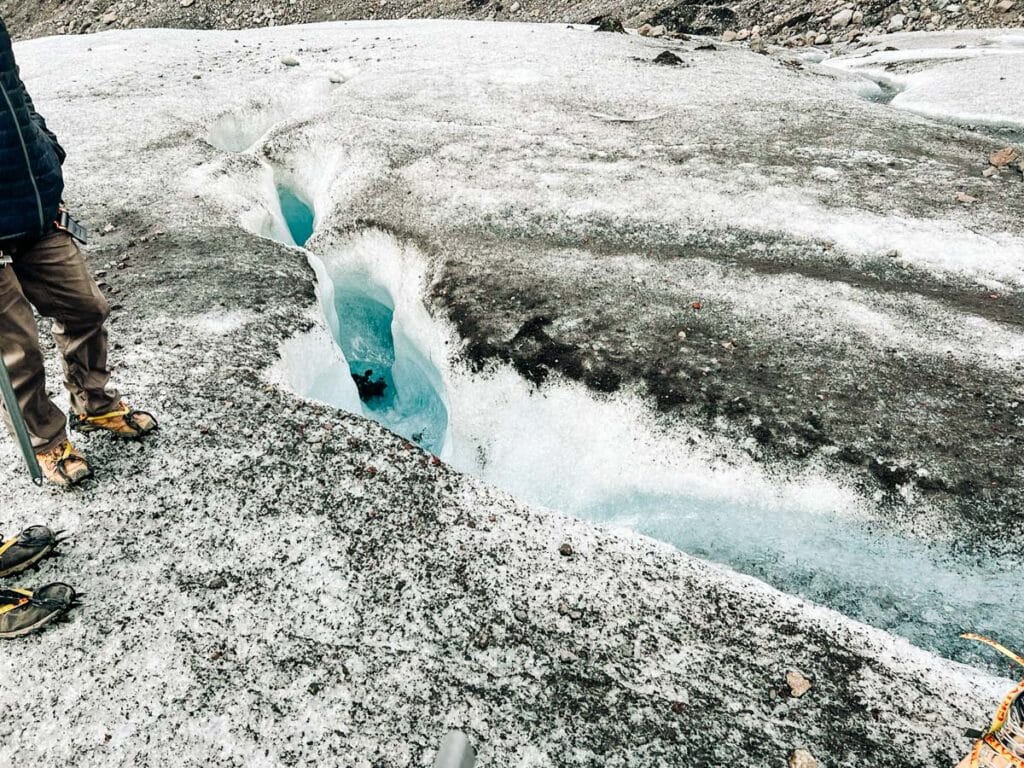
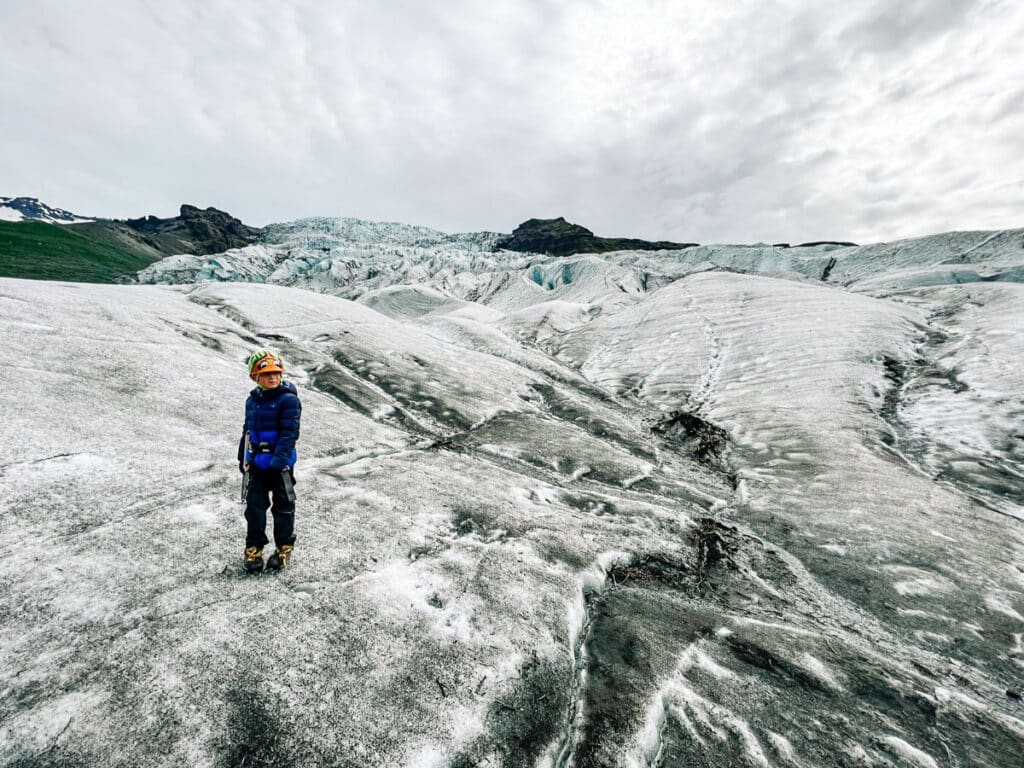
We spent a good two hours slowly walking up and around the glacier. Our guide carefully led us on the safest paths, avoiding the deep crevices that could swallow someone up! She stopped periodically to share information about the glacier and point out interesting features (and so we could take photos.)
Our guide even took this funny trick photo of my son, so he could tell his friends he went ice climbing. ;)
At one point, we came across a deep crevice and she tied off a safety line so we could take turns climbing to the top of the crevice and peering into the depth below. Very cool!
There were other tour groups out on the glacier as well, but our guide did a great job of avoiding them, so it never felt crowded. I couldn't help noticing the size of some of the groups - some with 20+ people. I was really happy that we picked the small group option - much more enjoyable and felt much safer as well.
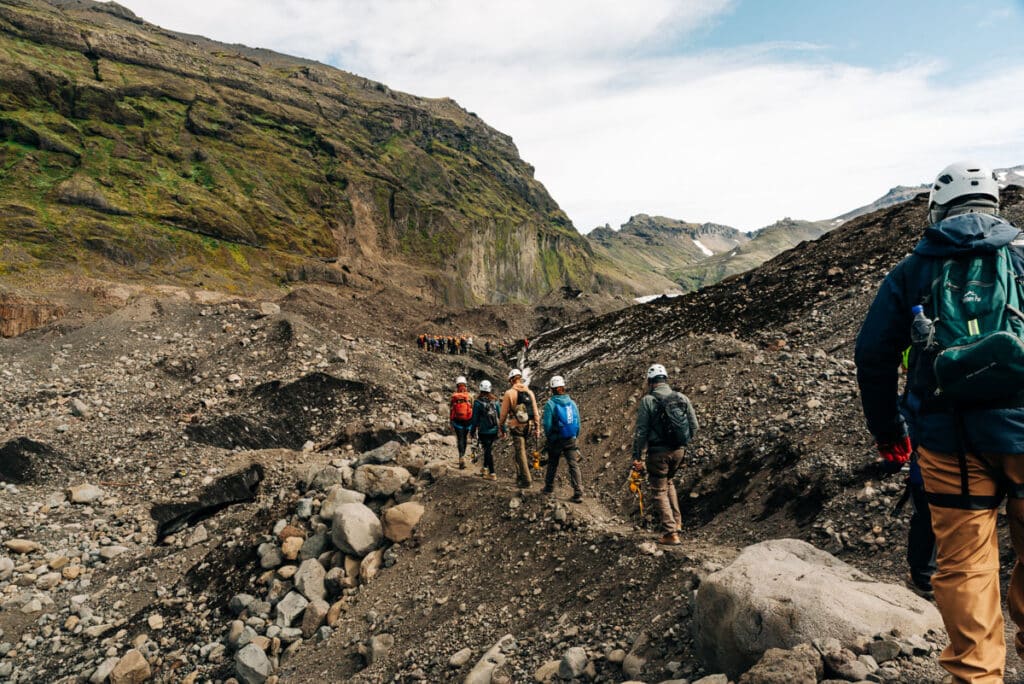
And this would also be a good time to mention that our tour was scheduled at slightly off hours from the larger groups. So if they started at 9, we started at 10. Giving us more separation from the big groups. Very smart!
When we had our fill of glacier time, we slowly made our way back down the glacier and took the equally adventurous 4x4 ride back to the airport meeting spot.
Would we do this glacier hike again?
Absolutely! This glacier hike was absolutely one of the highlights of our trip. It's a really special experience that can only be had in a few places in the world, so don't miss it. (This is the exact tour we booked, in case you want to book the same one!)
Tips for your Iceland Glacier Hike
A few quick tips from our personal experience, that will help make sure you have the best glacier hike possible.
Pick a tour with a small group, if possible. The experience will be much better and it also feels much safer for beginner hikers.
Wear tall hiking boots that cover your ankles. The short ones really don't work well for attaching the heavy crampons. Most tour companies have boots you can rent if you don't want to bring your own.
Bring sunglasses. Even if it seems overcast that day, the sun can be glaringly bright when reflecting off the white ice.
Take water. We didn't need to pack snacks or lunch for our short three hour tour, but we definitely needed our water bottles. Don't underestimate how much you are working. It may be cold - but a hike is still a lot of effort!
Tip your tour guide. We did, but I was wishing I had more ISK on me, as she was really great.
More Iceland Trip Planning Resources
If you're planning the ultimate trip to Iceland, be sure to check out these other helpful articles:
Leave a Reply